I knew I had to do not one but two journals in 2013. That's quite
daring considering the number of unfinished projects in my (art) life. But when
I was able to complete one journal in 2012, why not two in 2013?
I planned
my second journal to be about my word of the year... My word for 2013 is
PRIORITY and I wanted to have a separate journal to work in. As I mentioned in
one of my previous posts, I bought a lot of canvas paper for my Alpha Journal -
and I found it totally unsuitable and used regular cardstock
instead... But I decided to use the discarded canvas paper for my second
journal. I cut it to smaller pieces and bound the whole journal myself.
What was I
thinking? The paper curls a lot when wet and it's so frustrating to work on...
I also had to strengthen the
cover with tissue paper to make it a bit more user friendly. But only a bit...
This is how
it looks now. The cover is dirty, I will decorate it once I finish all the
inside pages, because I'm messy and I don't want to spend time wrapping the
cover with paper every time I want to work in my journal.

the journal

view from the top
The binding
is simple – I just made 6 holes in the spine and sew it all together with
thread. And it has a flap to hold it closed.
I painted
the first 2 pages and that was about it for a couple of months. I hated that
journal, I just couldn't find motivation to open it and start painting.

But I
didn't abandon it completely – I used the blank pages to clean my brushes
and/or stencils. And... one day... when I got tired of my Alpha Journal, I took
it, started to paint and... a couple of pages later... I learnt to love this
journal.


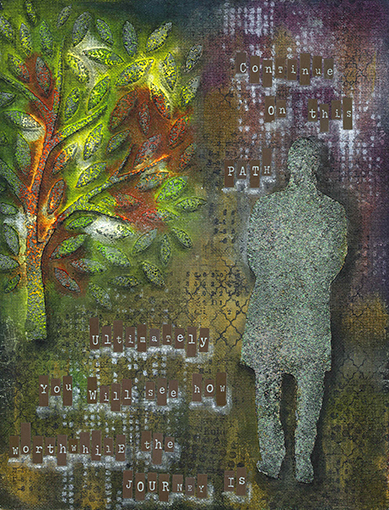
My first
double spread in this journal. The size of this journal is 8,5" by 11", so the double
page is 17"
by 11"
and that is a bit too big for me. But I liked the result and now
I'm getting more comfortable with this format.


This page was intended for a “Men” challenge
but turned out to be something slightly different from what the challenge was
about, so I didn't submit it in the end. I used a coarse structure paste
through my newest handmade/hand-cut stencils and played with Daler-Rowney FW
inks and my latest addiction – the distress paints.
[note to self: Why can't I look at my art as a finished product instead of seeing all that went wrong during the process of its making?]


